Recovering deleted files and folders has become one of those task on a PC which everyone of us should be aware of. We all makes mistakes while working on computers and some times these mistakes costs us lot of problems as well, especially when the mistake is accidently deletion of important files and folders. Although all of the deleted files first goes to the Recycle Bin, but what if you have cleared your Recycle bin as well.
Note: Unfortunately any deletion of file from an external Hard Drive, USB flash drive, Memory Sticks or Mapped Drives doesn’t go to the Recycle Bin. BE CAREFULL WITH THAT!!!
In such situations, I have seen many people panicking and running around over here and there. Taking advices from those who themselves don't know what to do and therefore guide others also in a wrong direction. But what if there is a solution to this problem at NO COST and which doesn't require any advance technical skills as well. Of course there is an easy way to recover your deleted files!!! (This doesn’t mean that now you can delete your friends files from his PC just for the sake of PRANK :P)

Recuva List Of Features
- Simple to use interface
- Save your time by searching for your files based on its Name / Type.
- Portable version of Recuva can be run from a USB Flash Disk
- Restores all types of files, documents, images, videos, songs, emails, JUST ANYTHING.
- Restores files from removable media (USB Flash Disks, Digital cameras, IPod, MP3 players, Floppy disks, etc.)
- Recover files / folders from Damaged or Formatted Disks
- Supports FAT12, FAT16, FAT32, exFAT, NTFS, NTFS5 , NTFS + EFS file systems
- Securely delete files you want to erase forever
- It's fast, tiny and takes seconds to run!
Important Notes
* Deleted files should be recovered as soon as possible, or else they are irretrievable / unrecoverable.
* If you want to recover your deleted files, you have to remember one thing: As Much Older The Deleted Files Are, As Much Difficult It's To Recover Them. Even if you recovered those old files, the chances of file corruption is very much possible.
* If you have deleted some files from the D Drive and now you want to recover them, It's highly recommended that you don't use that D drive till the time you are done with the file recovery. Means, If you Installed anything on that drive or used that Drive for some other work after the deletion of files, chances of recovering those files in a readable format will become very less.
* I will recommend to use a portable version of any File Recovery Software in order to restore your deleted files. Because, (as already said above) if you install anything on your Hard Disk, chances for the recovery of your files will become very less. Using the portable version of the software will help you to execute the software without even installing them.
How To Restore Deleted Files – Using Quick Scan
1. Visit the Recuva Download Page from Here.

2. Click Piriform.com link to begin downloading.
3. It's almost 3.5 MB in size and will not take much time for downloading.
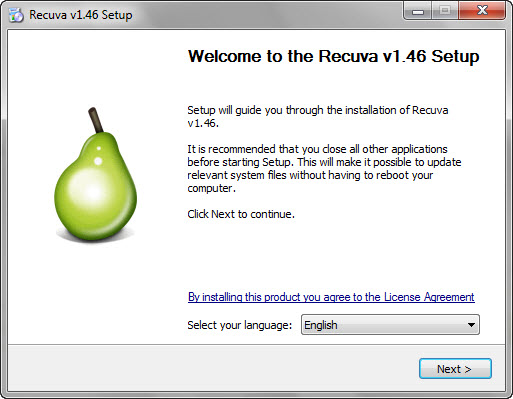
4. Once downloaded, double click the file to run the installation.
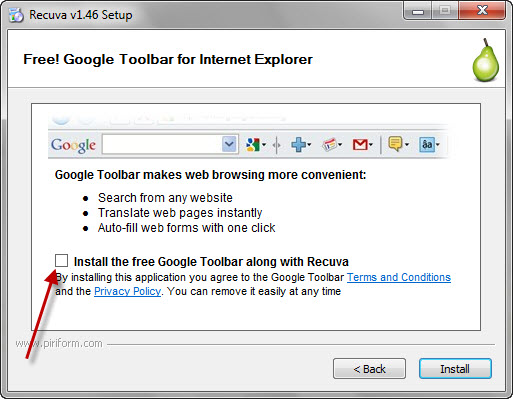
5. Installation steps are easy, but during installation it ask you to Install Google Toolbar as well. Un-check the box and then continue with the Installation.
Note: As already said above, I will recommend every user to download Portable version of Recuva from Here. The downloaded file will be in a .ZIP format. Unzip / Extract the files in a folder and then save that folder on a USB. Whenever you need this software, simply double click the Recuva.exe file Or if you are running 64-bit Windows, double-click the Recuva64.exe file.
6.Once the Installation is complete, if the software doesn't starts automatically, then open it from the Start Menu.
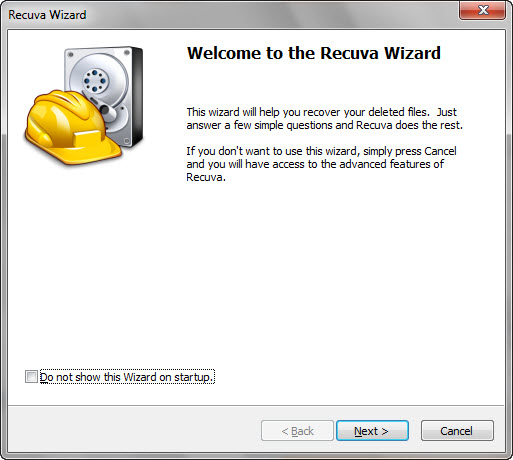
7. In order to help you recover your delete files, Recuva will start with a step by step guiding wizard, which is best for beginners. If you don't want to use this wizard, then just click Cancel button to open the Advance screen. But I recommend to use Wizard, since it really makes the whole recovery process pretty simple.
8. Clicking Next will bring the File Type selection page. Select the type of file which you are trying to recover.
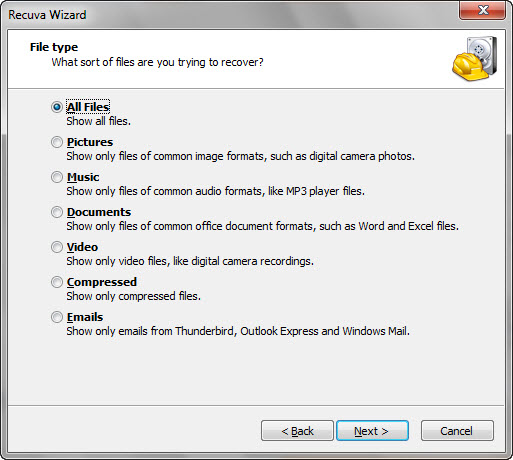
9. If you are not looking for any particular file type, then you can select the All Files option. Recuva will search for all of the deleted files if you select this option, but selecting a particular file type will save a lot of time and make it easier for you to find exactly what you are looking for.
10. After selecting the option, click Next.
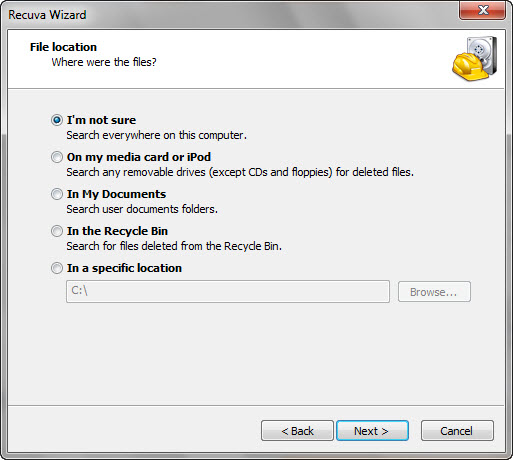
11. Now you have to specify the location of your deleted file by selecting the correct option. If you don't know the location of your file, then just select I'm not sure option or you can select In a specific location option and then click Browse button to select the correct location. Select the required option and then click Next.
12. On the last step it will ask you whether you want to do a Deep Scan. My recommendation is not to select this for the first time scan, because usually the Quick Scan can recover your recently deleted files easily. You can always go back and run a deep scan at a second time.

13. Click Start to find your recently deleted files.
14. Recuva will run a quick scan on all of your Hard Drives and will search for your deleted files.
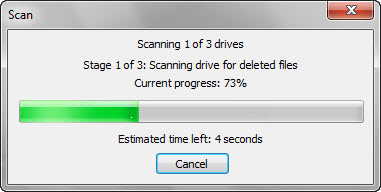
15. This process took only 2 or 3 minutes on my Computer (I'm having a 500GB Hard Disk) and then Recuva displayed the list of all the files which it was able to find it using Quick Scan method.
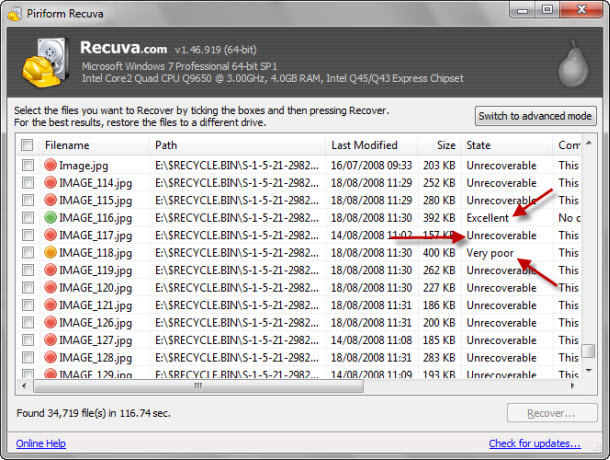
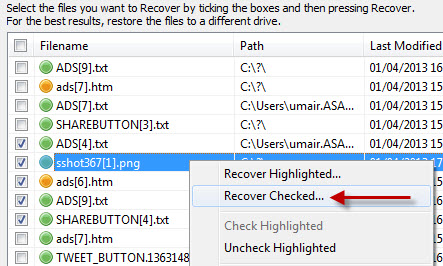
16. The files which are marked with Red circle are corrupted and it's useless to recover them, Orange means the file is in bad condition and you have to keep your fingers cross before recovering it. Green means that the files can be recovered and are in excellent condition.
17. Select the file which you want to Recover, then Right Click it and select Recover Highlighted option.
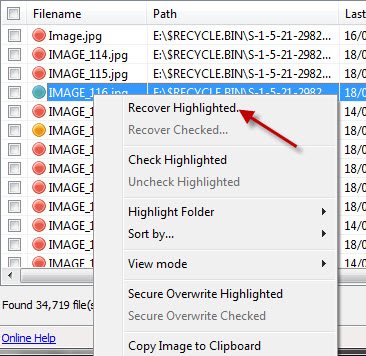
18. If you want to Recover multiple files, then click the check boxes for all those files which you want to recover, then Right Click and select Recover Checked option.
19. Select the location where you want to save the file and that's it.
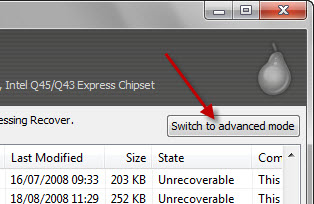
20. If you are confused and thinking what to recover and what not, (because Recuva will show you too many files at the result page), then you can click the Switch to advanced modebutton.
21. And then type the file name (if you know) at the search box or select the type of file you are looking for.
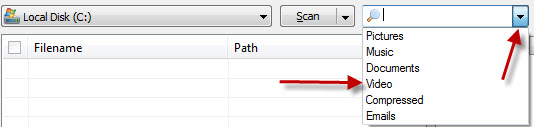
22. After clicking the filter type, it will immediately show you only those files according to the type you have selected or the name you have typed.
Recover Deleted Files Using Advance Mode -- Deep Scan Method
1. As already said above, I will recommend to try first Quick Scan method in order to Recover your Deleted files. If you are not able to find your files using that method or if you want to make an advance search to search for more files, then you can click Switch to advance modebutton at the Recuva result page.
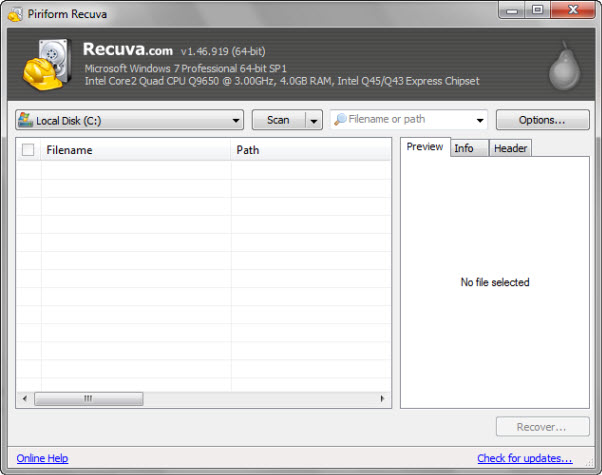
Or Open the Recuva software from the Start Menu and click Cancel button at the Wizard page. In both cases it will open this screen.
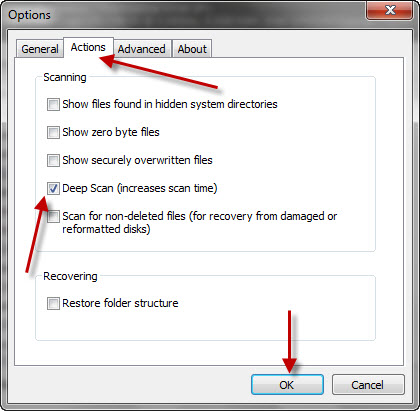
2. Now click Options button (at Top Right).
3. Click Actions tab, select Deep Scan option and then click OK.
4. Now select the Drive on which you want to Run the Deep Scan option or select All Local Disk option to run the scan on all the Drives.
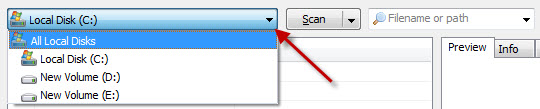
5. Type the file name (if you know) at the search box or select the type of file you are looking for or simply leave it blank in order to search for all the files.
6. Now click the Scan button to begin the Deep Scan process.
No comments:
Post a Comment